Today I will show you how to create a table of contents that links to the relevant section in the article by using HTML. No need to use plugins.
Having too many plugins can impact performance of your site, security, user experience and can cause compatibility issues.
While plugins are valuable for extending WordPress functionality, it’s important to be selective and only install those that are essential for your website’s needs.
I recommend that you regularly review and evaluate the plugins you have installed, removing any that are redundant or no longer serve a purpose. By keeping your plugin usage to a minimum, you can maintain a more efficient, secure, and user-friendly WordPress website.
If you are creating content for your site and want a free easy tracker to be always on top of your schedule, download here for free my content calendar template.
How to create a table of contents without using any plugins using the block editor
- In a HTML block in your WordPress editor, create a table of contents with the following format:
Table of Contents
<ul><li><a href=”#this-is-title-1″>This is title 1</a></li></ul>
<ul><li><a href=”#this-is-title-2″>This is title 2</a></li></ul>
<ul><li><a href=”#this-is-title-2.1″>This is title 2.1</a></li></ul>
- Then you have to create the title of the sections as follows, not using the editor-mode titles, but the HTML block:
<h2 id=”this-is-title-1″>This is title 1</h2>
<h2 id=”this-is-title-2″>This is title 2</h2>
<h3 id=”this-is-title-2.1″>This is title 2.1</h3>
In this way, the titles in your table of contents will link directly to the content in the article.
If you are in WordPress, you have to create a new HTML block or use the Code Editor instead of the Visual Editor. You can swap them by going to the three dots on the top right hand side corner and then going to Editor.
How to create a table of contents without using any plugins using HTML.
To create a table of contents with links to relevant sections in an article using HTML, you can follow these steps:
1. Structure your HTML document with appropriate headings. Use heading tags (`<h1>`, `<h2>`, `<h3>`, etc.) to mark different sections of your article. For example:

<h1>Introduction</h1>
<p>…</p>
<h2>Section 1</h2>
<p>…</p>
<h2>Section 2</h2>
<p>…</p>
<h3>Subsection 2.1</h3>
<p>…</p>
<h3>Subsection 2.2</h3>
<p>…</p>
<h2>Section 3</h2>
<p>…</p>
2. Create an empty `<nav>` element where you want your table of contents to appear:

<nav id=”table-of-contents”></nav>
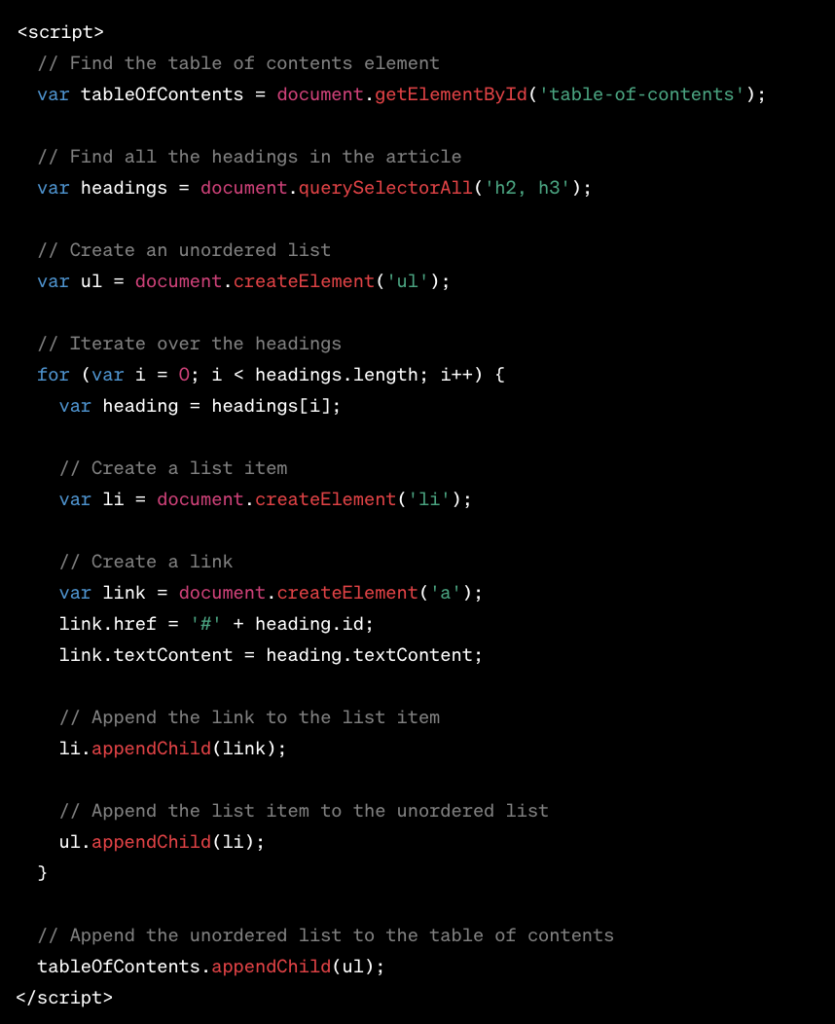
3. Add JavaScript to generate the table of contents and insert it into the `<nav>` element. Here’s an example of how you can achieve this using JavaScript:

<script>
// Find the table of contents element
var tableOfContents = document.getElementById(‘table-of-contents’);
// Find all the headings in the article
var headings = document.querySelectorAll(‘h2, h3’);
// Create an unordered list
var ul = document.createElement(‘ul’);
// Iterate over the headings
for (var i = 0; i < headings.length; i++) {
var heading = headings[i];
// Create a list item
var li = document.createElement(‘li’);
// Create a link
var link = document.createElement(‘a’);
link.href = ‘#’ + heading.id;
link.textContent = heading.textContent;
// Append the link to the list item
li.appendChild(link);
// Append the list item to the unordered list
ul.appendChild(li);
}
// Append the unordered list to the table of contents
tableOfContents.appendChild(ul);
</script>
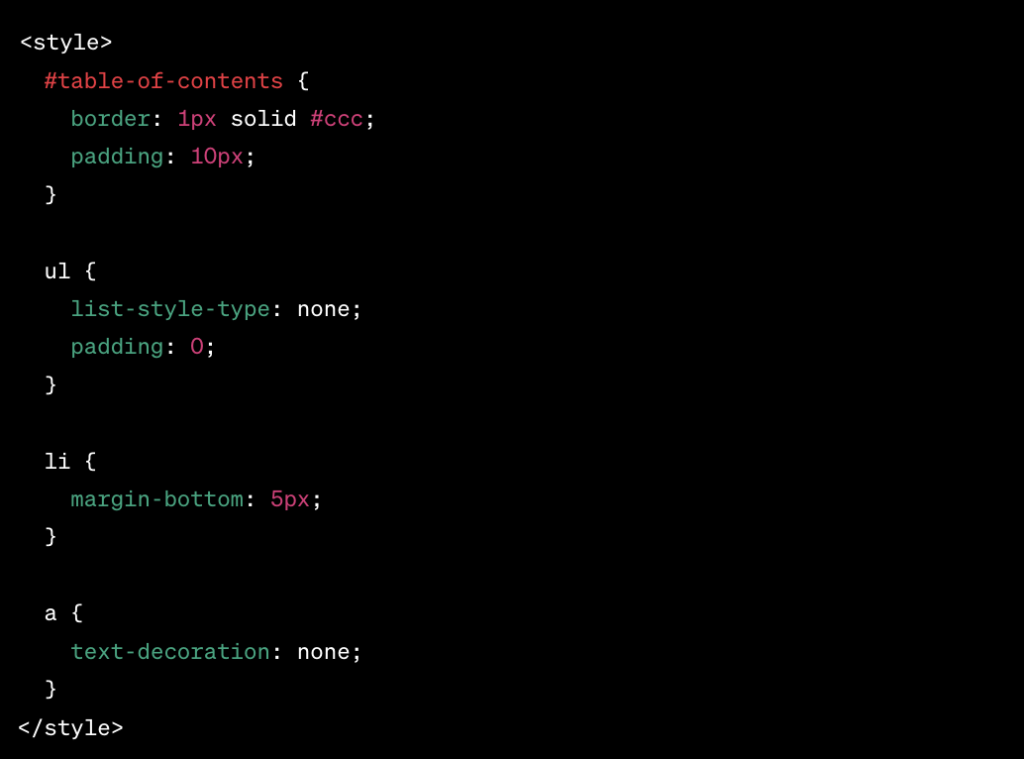
4. Style your table of contents using CSS to make it visually appealing. For example:

<style>
#table-of-contents {
border: 1px solid #ccc;
padding: 10px;
}
ul {
list-style-type: none;
padding: 0;
}
li {
margin-bottom: 5px;
}
a {
text-decoration: none;
}
</style>
5. Place the JavaScript code and CSS styles within appropriate `<script>` and `<style>` tags, respectively, in the `<head>` section of your HTML document or in an external JavaScript and CSS file.
When you load your HTML page in a browser, you should see the table of contents generated based on the headings in your article, with each entry linking to the corresponding section within the page.
If you are interested in leveraging your time when building a new websites, think about shortcodes. Shortcodes streamline website development by simplifying code, enhancing user-friendliness, ensuring consistency, saving time, enabling dynamic content, promoting compatibility with plugins and themes, facilitating updates, improving debugging, and allowing for customized and efficient integration of complex elements. Here is a guide on how to use shortcodes in WordPress.
Keep your claws sharp and your marketing instincts keen, until we meet again in the next post!
Missing me already, dear human? You can find me on X and Facebook.
Moxie

